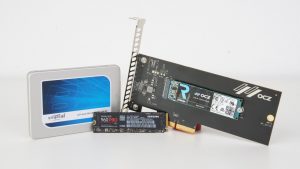
So, this tutorial will be mostly for Windows 7 and Windows 8 (8.1) users who don’t want to upgrade their PC to Windows 10 which already supports NVMe drives out of the box. But of course, some steps are just the same for Windows 10 too. Difficulty here is “4 or 5” so if you are not good with PC hardware and etc it is really better for you to ask an assistance of your friend or of a specialist. This article was originally written in English so please use this language to view it correctly.
So let’s say we have the following situation:
- A working computer with a motherboard supporting M.2 nvme SSD or PCI-Ex4 slot for AIC-SSD with correctly bootable Windows OS
- An SSD drive with enough free space on it to fit 100% of your system drive
- System is installed on MBR partitioned drive
Preparations
Initialization of the SSD
Install the SSD without removing other drives, just insert it into your motherboard and boot Windows.
Install driver
This step is crucial for us. Now you have to download driver for your NVMe SSD and it is quite hard to find nowadays but I’ve got this link for you so just go there and find your model, then download drivers. Note that Plextor SSD actually needs driver for Lite-On SSD. If the link is dead visit mirror OneDrive folder. (actual for date: the 26 March of the 2018). Also, put the folder with drivers for your SSD on an USB flash drive or on one of your HDDs. It will be needed further. Let’s say you will put these files into the directory called “Drivers_ssd”
Go to Device Manager->Disk Management and ensure that your disk is not visible for Windows. If initialization dialog pops up just say OK and init the drive.
Check space
Let’s say you’ve bought an SSD with 250GB space and you have system disk 320GB (Sata HDD) but you still want to move your system to the SSD and don’t want to reinstall system and lose some data. If you have enough space – skip this step. But if it is your case, download WinDirStat program and scan the disk “C” in order to easily find large files and delete them or move. For example, such files as “pagefile.sys” and “hiberfile” also can be deleted or leave them as is. You need to have system disk where files takes up to 240 GB (your SSD volume minus at least 10GB).
Download software and Live CD/DVD/USB
Download the latest version of Ubuntu installation media here and burn it on DVD-R or on USB flash (use this tutorial)
Also, download Windows installation media (Windows 10 installation media is OK even if you have other system) or use one that were provided you by you PC/Laptop manufacturer (minimum is Windows 7) and burn it on DVD-R or make an installation USB drive by following this tutorial.
Clone system disk
It is easier is to use Acronis Backup and Recovery 11.7 (this is a minimaly required version). But note that Acronis software is not free and you will need to buy it first. Check the tutorial for cloning disk using Acronis.
Clone using GParted. I’ve found a nice tutorial here. Also this tutorial actually gives you almost all you need to do for copying your system disk.
Disk cloning will take some time of course, so let’s be patient until it finishes the job.
Fail boot recovery
There is a large chance that your PC won’t boot after copying system to other disk because disk id and path will change.
- Now shutdown your PC and plug out your old HDD (or Sata SSD) or skip this step if you don’t want your old drive to be disabled.
- Load into BIOS and set first Hardrive to NVMe SSD drive. Set it to be First in boot order
- Try to load Windows
If failed, load into your Windows boot media that you have created earlier and insert USB flash that contains drivers for SSD. Press “Install windows” on the first screen, then choose “Recovery” option. You will have to load SSD driver here by chosing an “inf” file from “Drivers_ssd” file. After the load is finished call command window here by pressing Shift+F10 combination. Then write “regedit” and in opened window of Registry Editor select a hive and choose File->Export hive. You will see Explorer open dialog, so check out what is the letter of your new SSD drive here. Let’s say in our case it is “J:\”. So now go to this disk in cmd interface by using
J:\
cd Boot
dir
If you have an error here, you missed the letter of your boot drive. On windows the boot drive can be different. Usually it is a 100MB partition on the same disk. In this case it will be more difficult. Using diskpart command line application assign a letter for your boot drive. Let’s say you’ve assigned a letter “K:\”. So repeat the following with the new letter and continue with next commands (note that these commands are for the situation when you a separate partition for boot):
K:\
cd \
attrib -s -h Boot
ren Boot Boot.old
bcdboot J:\Windows /s K:
bootsect /nt60 K: /mbr /force
bootsect /nt60 K: /force
And now reboot your PC. Windows should be booting well.
![]()


